|
By using the new Worksheet as a reference from
the building section we are able to align the engineered
wall up with the older modeled wall in the ArchiCAD 11
model. As you can see from the QuickTime animation, this
process
of grabbing the referenced worksheet drawing elements and
aligning with the 3D model is quite easy. To better evaluate
the accuracy of alignment the Trace & Reference palette
enables you choose the active view or the reference view
or both and alter their degree transparency. You can also
adjust color (more on this palette in a bit). (see
QuickTime QT-4).
|
|
|
|
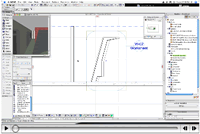
QuickTime
: QT-3 - Creating a new Worksheet and bringing in
external data into the ArchiCAD 11 file for further
coordination.
|
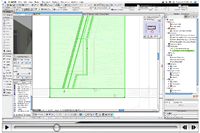
QuickTime
: QT-4 - Aligning the external "reference" viewpoint
data with the model and using the Visual Compare
splitter bar tools.
|
The most obvious candidate for the coolest
new feature in ArchiCAD 11 is easily the Visual Compare
tools. Once you believe you have your reference properly
aligned with your "active" viewpoint you can
utilize new Splitter bars. Dragging these bars across the
screen (up/down or east to west on the screen) creates an
X-ray or CAT-scan effect -- as if you are seeing through
the body of your architecture. This is a very cool tool and
would be most useful for comparing complex geometry profiles
such as the one created in our test file. (see
QuickTime QT-4).
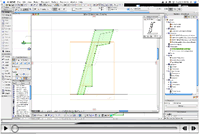
In our file we must edit the 3D model to match
the engineered curved wall. Part of this process is shown
in this animation here.(see QuickTime
QT-5).
|
|
|
|
QuickTime
: QT-5 - Editing the model data using the Visual
Compare reference drawing from the Worksheet with
external data.
|
|
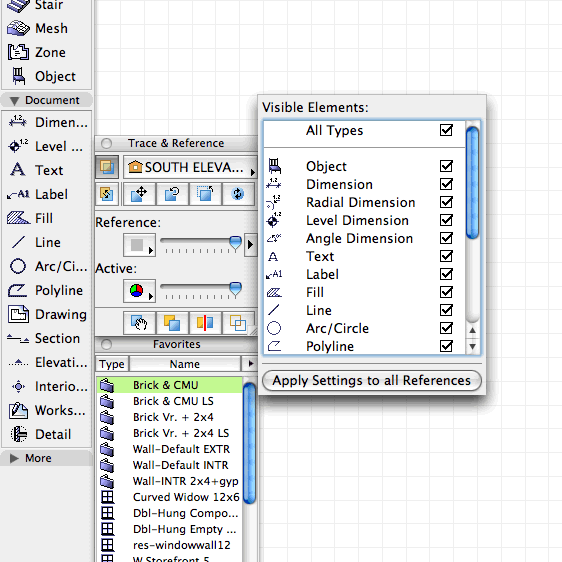
The Trace & Reference palette includes
at the top a button that toggles trace on and off and a Reference
drop-down menu. Below that is a row of five buttons: the
first allow toggling back and forth between reference and
active view. The next three are position of the reference
(drag is most important). The fifth button is a "rebuild"
reference. In the middle are the sliders (zero to 100% opacity)
and
color activations. At the bottom are four buttons
useful to Visual Compare. The most important Splitter button
is second one from the right. (see
image 03). The color
palettes allow you to change the color of the reference
or the active view. And just to the right of the Reference
opacity slider is a black triangle that flips out a Visible
Elements
pop-out sub-palette. From here you have fine-grain control
over what elements in the "reference" are visible
and which ones are not. You can also apply these controls
individually
or to all references. (see image 03).
|
|
|
|
O3
- The new Trace & Reference Palette. It includes
a pop-out Visible Elements sub-palette which enables
finer grain control.
|
|
Modeling Improvements
The big new modeling feature in ArchiCAD 11
is a direct response to criticism applied to ArchiCAD 10,
when
Graphisoft
touted its complex profile capabilities. Now is it possible
to utilize complex profiles with curved walls, not just linear
walls. In Graphisoft's BEK (BIM Experience Kit) interactive
training materials there is a quick example of taking a slanted
wall, modifying its profile, and then curving the entire
wall -- all in 3D view. We had a slightly harder time in
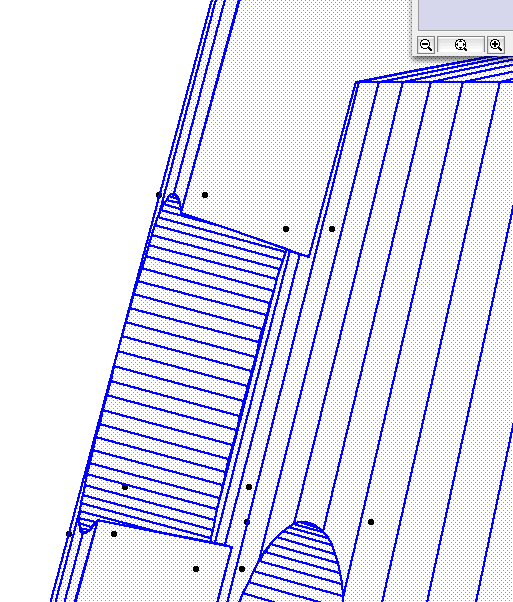
our test file. We first created a curved wall on purpose.
This is obviously
more logical in terms of architectural design
anyway. From our curved wall (see image
01) we performed
the Capture Profile Section function. From here we modified
it
to the shape we wanted. Earlier in the review we mentioned
that we then exported that wall profile out for engineering
work.
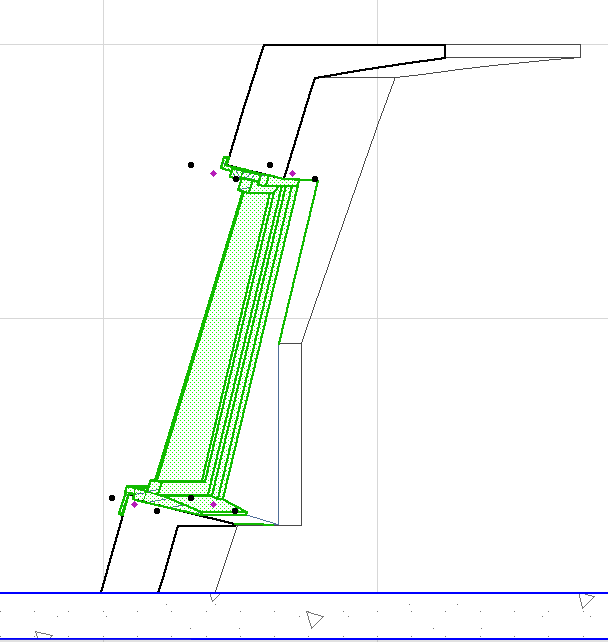
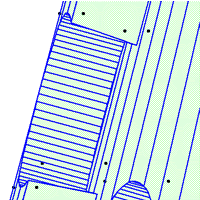
One question you might have about curved walls
with complex profiles is what happens to openings placed
into them? Can you even place windows or doors in them in
the first place? How does the jamb resolve itself, et cetera?
We tested this out a bit. In our complex wall we dropped
in three round openings and a large window. Now openings
are simply that, no casing, no door, no glass or frame. Did
the
geometry
of the shape resolve
itself correctly with a round opening? The answer is yes.
(see images 04-05).
 |
|
|
O4
- Note the angle of the cut at the head of the round
opening, it is parallel to the dominant angle of
the complex profiled wall. The default orientation
is "Associate with Wall."
|
O5
- With a window the default placed the window parallel
with the slope, and it successfully resolved complex
geometries, the straight sections spanning from jamb
side to jamb side.
|
With our particular curved slanted wall we
noticed that the default vertical orientation is "associate
with wall" versus "vertical." However you can change this
via the Window or Door settings palette. (see
QuickTime QT-6). From that palette you can decide
which orientation you want your openings to relate to. While
it
provides good
flexibility and the results are sophisticated in their modeling
resolution,
we think an axis diagram of the unit with the ability for
the user to tilt-adjust it would be even better.
next
page > | 1 | 2 | 3 |
4 |
|