|
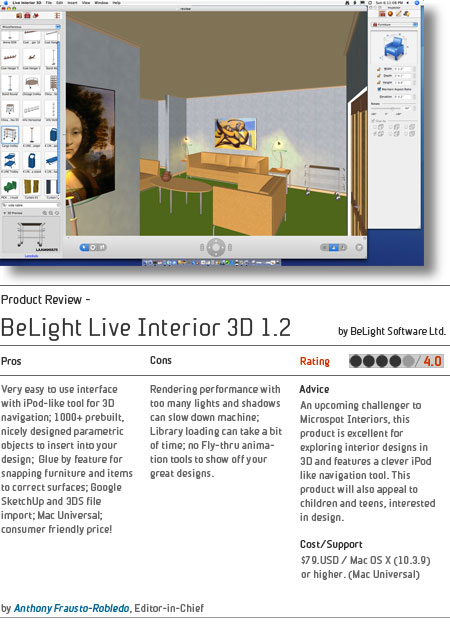
Live Interior 3D by
BeLight is the second program of its kind to come to the
Mac software
market in the past
few years. First discussed in last January's Macworld
San Francisco expo reports, the product at first glance has
a much more mature interface than one might associate with
a point one release. It is also interesting to note that
Live Interior 3D is a more specific program than some of
its rivals such as Home Design Studio, which we reviewed
last
month.
Live
Interior 3D is specifically geared towards
interior design, not architecture or whole home and garden
design. It helps you visualize your office, home or apartment
interior and find optimal spatial configurations and placement
for furniture and other 3D objects in an environment. As
such, it ships with pre-built 3D models of real world objects
from such furniture makers as Piironinen, Villeroy & Boch
and others. There are over 1000 library objects in total
and you can grab more with built-in connections to Google's
expansive 3D Warehouse.
Getting Started
After setting some basic preferences (such
as units appropriate to your location in the world) and a
your preferred 3D rendering preferences for working, you
can begin to design.
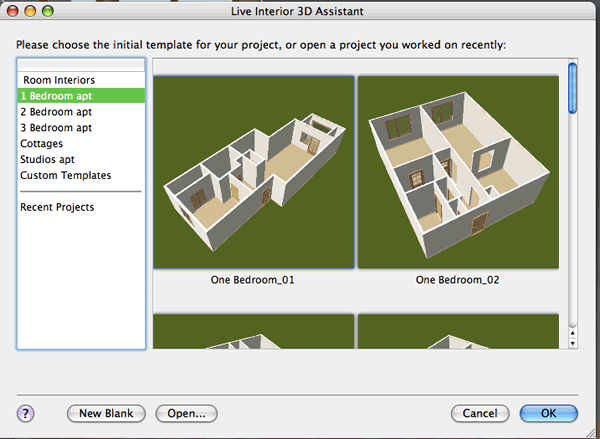
Users might want to start a project using one
of many pre-designed apartment layouts. (see
image 01) You
can select New Blank to design your layout from scratch --
which is probably how many users will prefer to work. In
the meantime,
while
you are learning the program working on a pre built flat
may speed up your learning and allow you to get familiar
with the
design aspects of the program.
|
|
|
|
01
- Live Assistant - You can start with a pre-built
apartment design and modify that or you can draw your own
plan. |
|
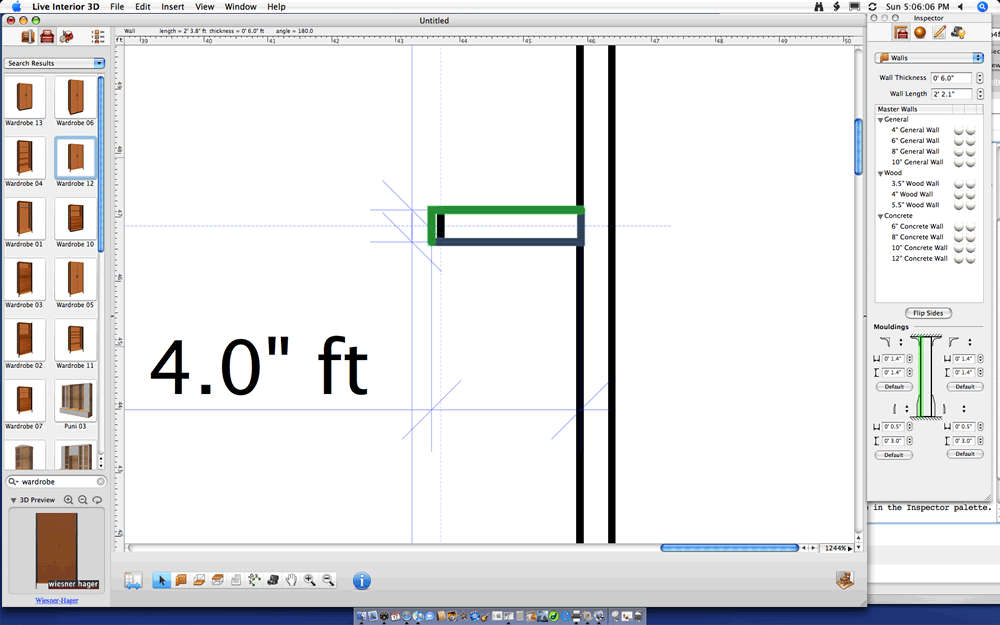
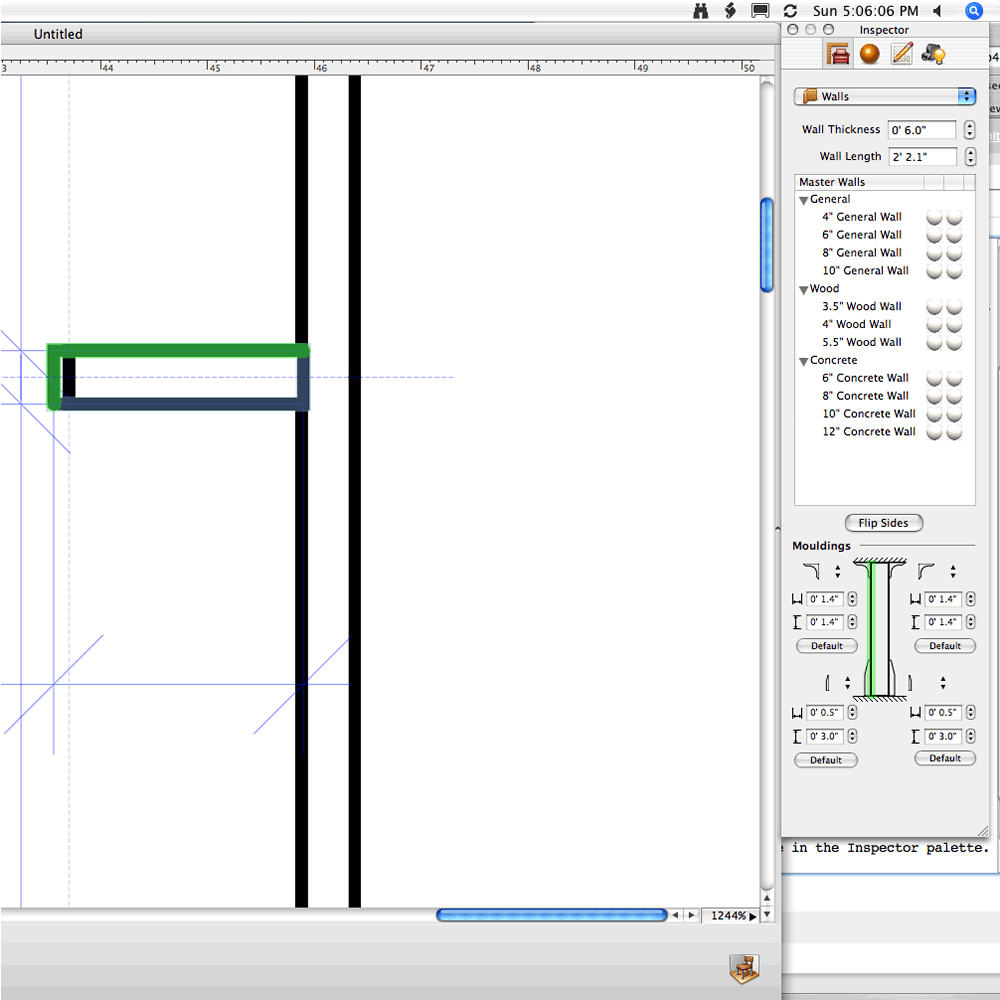
Adding a window or wall to your layout is very
easy with Live Interior 3D. Objects snap together
smoothly and a dimension pops up as you lay down new walls
or
alter existing ones, giving you dimensional control. Numeric
input is available in the Inspector palette. (see
image 02– 03) There
are also master walls which can be assigned properties
and then applied to discreet walls which you wish to
utilize. Wall thickness can be fully altered, so there
is quite
a bit of flexibility and in Live
Interior 3D.
|
|
|
|
02
- Wall Objects - they snap together with intelligence
making design easy and fun. |
03
- Numeric Input - allows the user to get precise
with wall lengths. |
To lay out walls, add doors, and windows, you
work in the 2D plan view, which can dominate the entire screen
work space or be shared with the 3D rendered view. Once you
are ready to add things like furniture you open up the
Library
where
Furnishing
is
one of three main choices (the others being Building elements
(eg: doors, windows, columns) and Google 3D Warehouse. More
on that later.
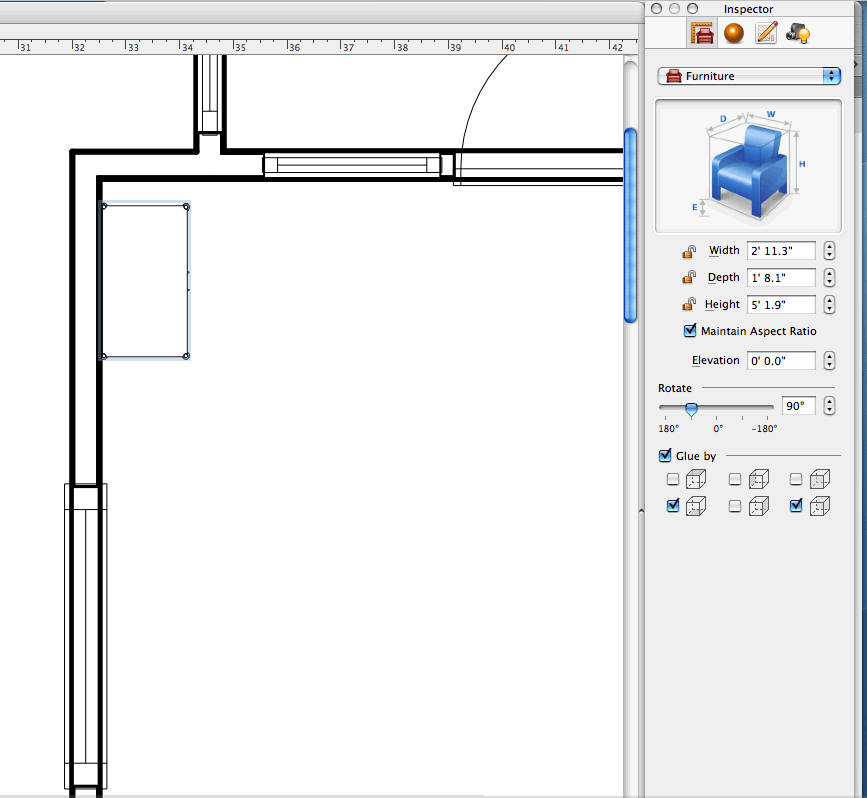
Decorating Your Apartment
From the Library you can select from hundreds
of 3D furniture items organized into various categories.
Their location within your plan is greatly aided by Live
Interior 3D's
use of the Glu-by function. With variable control you can
determine
if objects "stick" to the floor and walls behind
them, or even the ceiling allowing for precise and nice fit.
(see image 04-05)
|
|
|
|
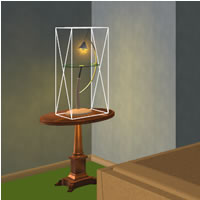
04
- Glueby feature allows custom settings for which
face or faces stick to adjoining surfaces (eg: floor,
ceiling)
|
05
- Glueby feature means objects like lights can snap
to table surfaces so you don't need to know the height
of table tops.
|
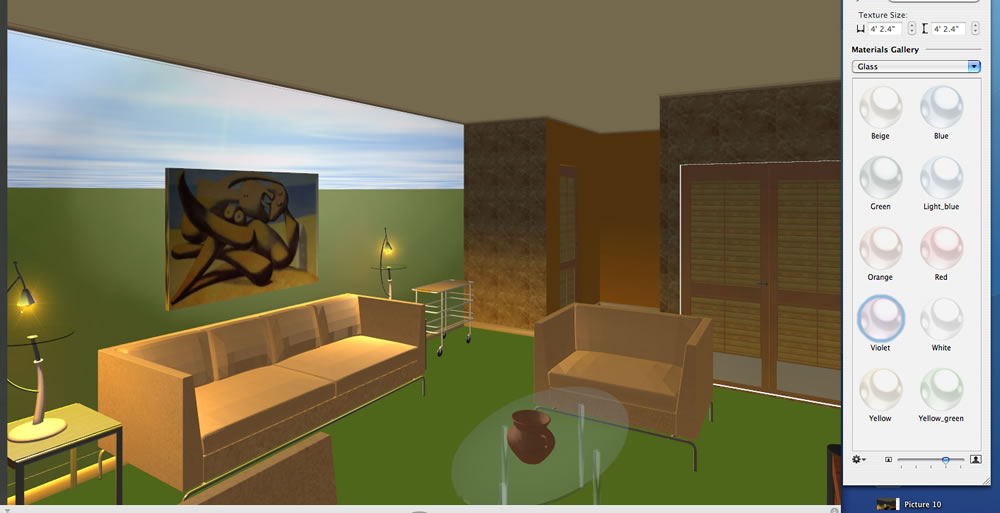
The fun really begins by laying out your furniture
and testing new arrangements. Individual items be altered
by applying new material textures to them. For instance,
say you don't like that yellow color fabric on one of the
standard sofas? No problem, apply a nice dark leather from
the materials Library window. One can play for hours with
trying different color and material combinations within a
room.
You can apply any texture to any object, turning
couches invisible by applying glass textures, or you can
simulate wall-to-wall, floor-to-ceiling glass windows by
turning an entire wall transparent by applying "glass" to
it. (see images 06-07) That
may be another way to simulate apartments in high-rise buildings
with full glass walls.
|
|
|
|
06
- Any object can receive textures from the Materials
palette -- even walls can be turned into glass by
applying the glass materials.
|
07
- It is possible to create new materials, import
them, name them and implement advanced rendering
settings.
|
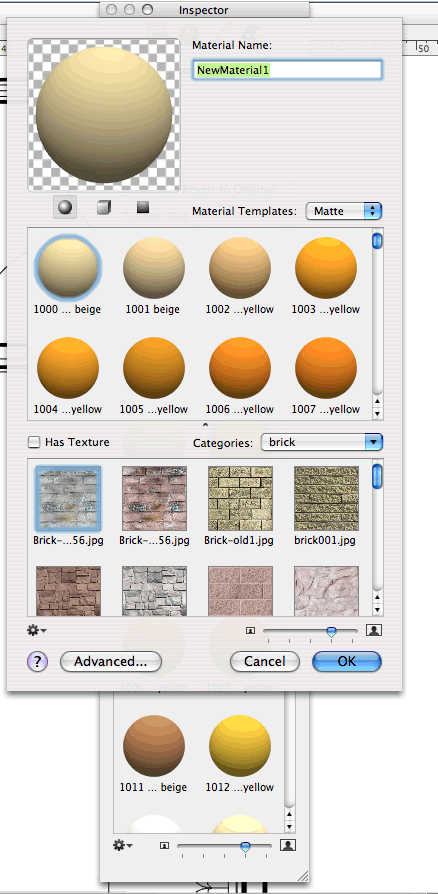
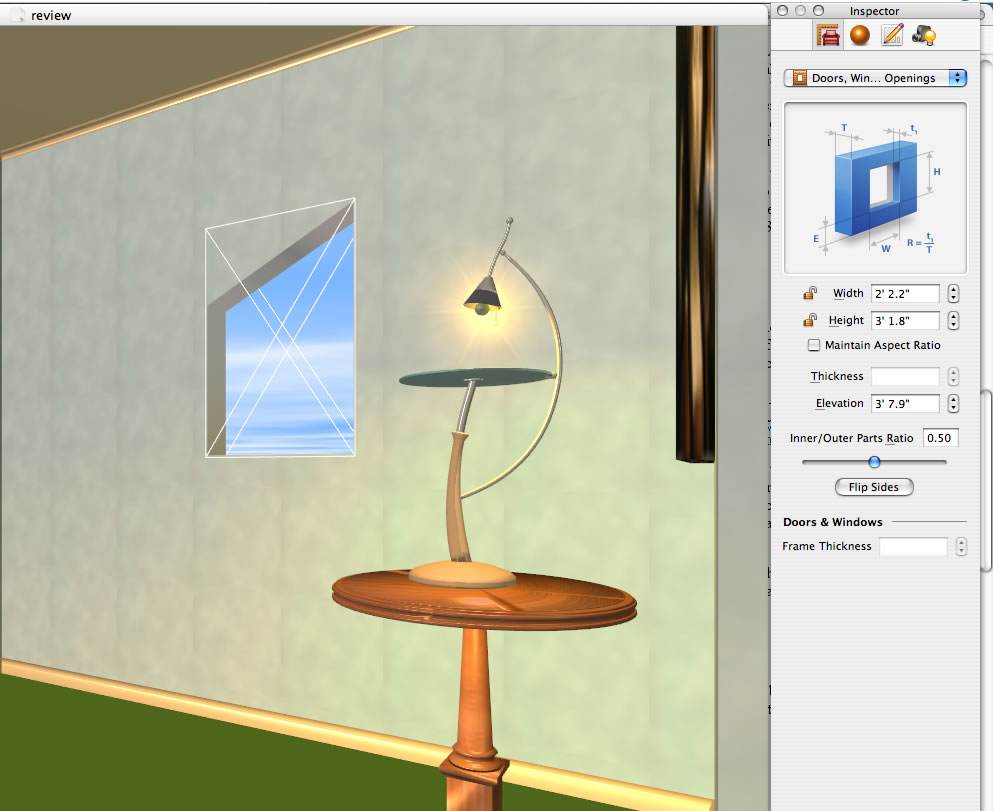
Designing with Objects
Live
Interior 3D 1.2 ships with over 1000
pre-built objects, all organized within the main interface
at the Object Panel. Architectural elements include doors,
windows, niches, columns, openings and shapes. We were surprised
that angled top openings didn't allow you to change the angle
via the Inspector palette. However, you can affect the parameters
of width, height, aspect ratio and alter depth (how it fits
in the wall) and flip sides (useful for two-sided elements).
(see image 08)
|
|
|
|
08
- Object geometry is adjusted in the Inspector palette
with a graphic corresponding to measurements.
|
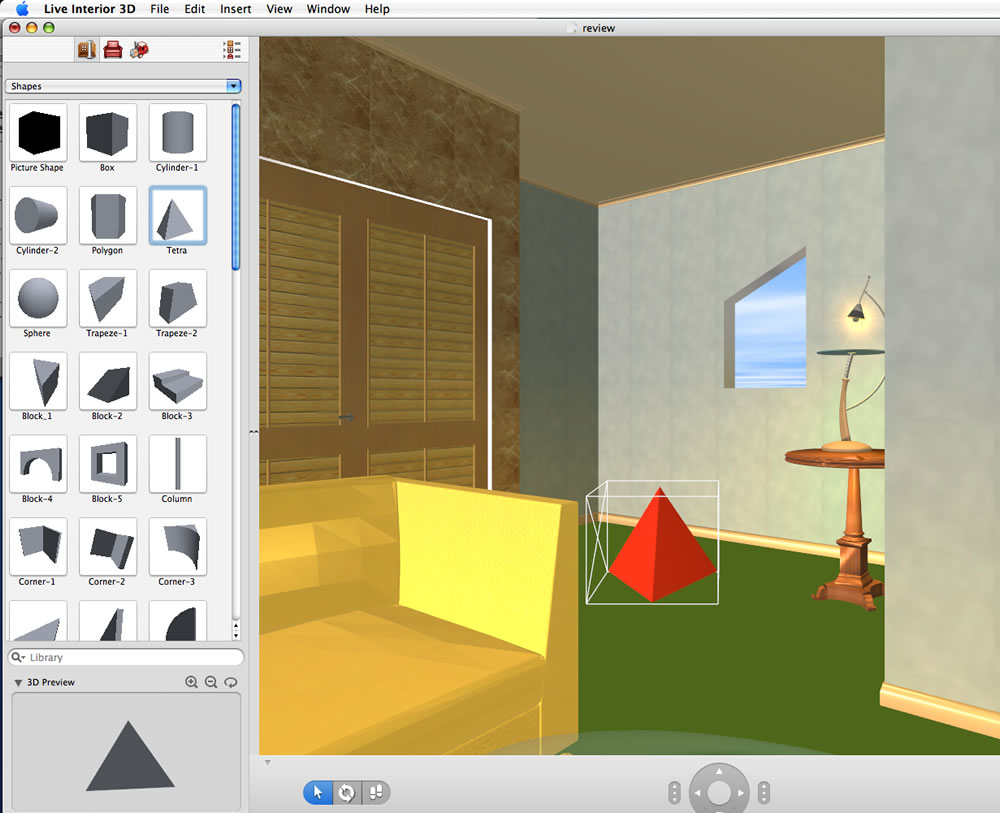
09
- The Shapes sub-library includes all kinds of useful
and interesting solid objects, such as Tetras and
cylinders -- apply any material to them such as stone
or shiny plastic.
|
The shapes in the Library include things like
boxes, cylinders, a tetra, a sphere, stepping blocks, curved
corners, and solid-patterned surfaces -- all potentially
useful in creating interesting designs. Such shapes come
into the model in standard gray but can easily be modified
via the Inspect palette to take on a different material and
color (like the
glossy
red plastic tetra
we have ploppedd in our room above). (see
image 09)
The program's Google 3D Warehouse integration
features two options. One can natively import Google
SketchUp model data into your project or you can grabs models directly
from
the Google
3D Warehouse via the program's interface. This
however was not working for us. The manual describes a way
in which you can select object thumbnails from the drop-down
menu in the Object panel, but each time we selected the Google
3D Warehouse tab it launched our Safari browser instead taking
us to the Warehouse online, whereupon you can drill down
into object categories, select models, download them to your
computer and integrate them in Live
Interior 3D.
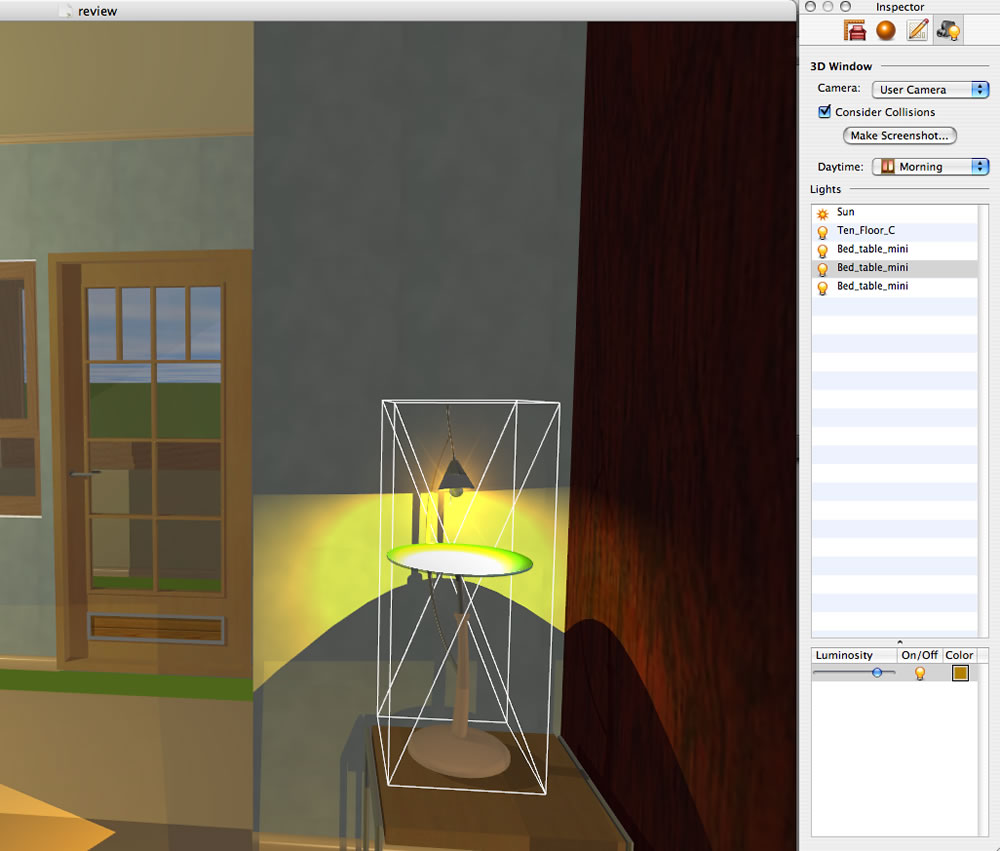
Controlling Light
Live Interior 3D offers the user several preset
global lighting settings, including Day, Night, Sunrise and
Sunset. Better yet you can establish more accurate external
sources of light by telling the program what part of the
world your project lives in. You do this roughly via a Geographical
Latitude dial.
|
|
|
|
10
- With a Light object you can set the luminosity
or brightness of the light inside the Inspector palette.
|
11
- Overall rendering quality was good but we did experience
a few problems as shown here.
|
Additionally, you will want to add interior
light sources to your interior design via table lamps, floor
lamps and ceiling fixtures. From the Inspector palette you
can change the light intensity and light color on a per fixture
basis or even turn fixtures off and on. (see
image 10)
next
page > | 1 | 2 |
|